
Oil change is a crucial aspect of vehicle maintenance. Understanding the frequency, procedure, and types of oil is vital for optimal engine performance and longevity. This guide dives deep into the world of oil changes, covering everything from DIY techniques to professional services, ensuring you’re well-equipped to keep your car running smoothly.
From understanding the recommended intervals for different vehicles and driving conditions to the various oil types available, this comprehensive guide provides a wealth of information. Learn how to perform an oil change at home safely and efficiently, while also comparing the costs and environmental impact of DIY vs. professional services.
Oil Change Frequency
Oil changes are a crucial aspect of vehicle maintenance, directly impacting engine performance and longevity. Proper oil change intervals are essential to prevent premature wear and tear, ensuring smooth operation and reducing the risk of costly repairs down the line. The frequency of oil changes is influenced by a multitude of factors, including vehicle type, driving conditions, and manufacturer recommendations.Understanding these factors is key to maintaining optimal engine health and avoiding potential problems.
Different vehicles have varying needs, and tailoring the oil change schedule to specific circumstances is vital for maintaining peak performance. This section delves into the intricate relationship between driving habits, vehicle characteristics, and the optimal oil change frequency.
Factors Affecting Oil Change Frequency
Various factors influence the recommended oil change intervals. Driving conditions, vehicle type, and even the specific oil used play a significant role in determining how often an oil change is necessary. Engine type and maintenance practices also contribute to the overall picture.
- Driving Conditions: Frequent highway driving, towing heavy loads, or driving in extreme temperatures can significantly impact oil degradation. Heavy loads and high speeds generate more friction and heat, accelerating the breakdown of the oil’s lubricating properties. Frequent stop-and-go city driving can also contribute to oil degradation due to increased engine heat cycles.
- Vehicle Type: The type of vehicle, including its size, engine type, and age, can influence oil change frequency. Heavily loaded trucks, for example, may require more frequent oil changes than smaller passenger cars. Modern vehicles with advanced engine designs may have different specifications for oil and change intervals.
- Oil Type and Quality: The quality and type of oil used in the engine are critical. High-quality synthetic oils tend to have a longer lifespan compared to conventional oils, thus potentially extending the intervals between oil changes. The specific oil’s specifications should be considered, including viscosity and additives, which can affect its performance and longevity.
Recommended Oil Change Intervals
The recommended oil change intervals vary significantly depending on the vehicle and its usage. Manufacturers provide guidelines based on their research and testing, considering different driving conditions and engine types. Adhering to these recommendations is generally crucial for optimal engine performance and longevity.
- Passenger Cars: Passenger cars typically follow a schedule of oil changes every 3,000 to 7,500 miles, depending on driving conditions and manufacturer recommendations. However, some vehicles might require more frequent oil changes, especially under demanding conditions.
- Trucks and SUVs: Trucks and SUVs, particularly those towing heavy loads or operating in harsh conditions, often benefit from more frequent oil changes. Intervals could be as short as 3,000 miles or as long as 7,500 miles, depending on the manufacturer’s specifications and operating conditions. Regular monitoring of the oil condition is crucial.
- High-Performance Vehicles: High-performance vehicles, often used for racing or demanding driving conditions, typically require more frequent oil changes due to increased engine stress. The interval can be as short as 2,000 miles in some cases.
Manufacturer Recommendations
Different automotive manufacturers have their own recommended oil change intervals. These intervals can vary based on the specific vehicle model, engine type, and driving conditions. Manufacturers typically provide guidelines in their owner’s manuals. It’s essential to consult the owner’s manual for the specific vehicle to determine the manufacturer’s recommended schedule.
| Driving Condition | Oil Change Interval (Approximate) |
|---|---|
| City Driving | 3,000 – 5,000 miles |
| Highway Driving | 5,000 – 7,500 miles |
| Heavy Towing | 2,500 – 3,500 miles |
| Extreme Temperatures | 2,000 – 4,000 miles |
| High-Performance Driving | 1,500 – 3,000 miles |
Oil Change Procedure
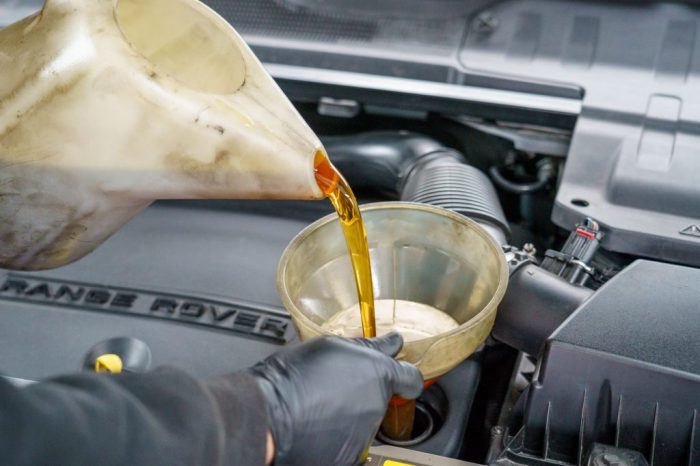
Performing an oil change yourself can save you money and provide a satisfying sense of accomplishment. This guide provides a comprehensive overview of the process, including necessary tools, safety precautions, and a step-by-step example for a 2020 Honda Civic.
Essential Tools and Materials
Proper tools and materials are crucial for a successful and safe oil change. This section Artikels the necessary items.
- Oil Filter: A new oil filter is essential for efficient oil flow and optimal engine performance. Ensure you select the correct filter type for your vehicle, as compatibility is vital.
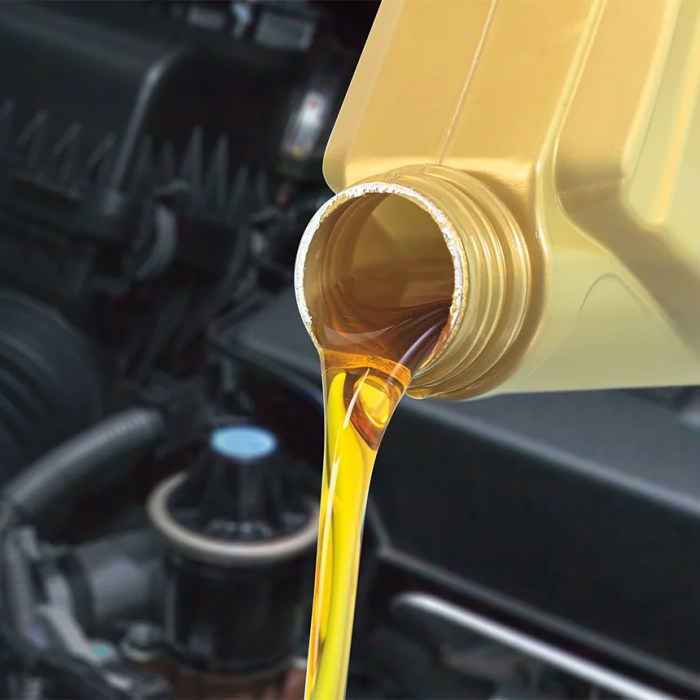
- New Oil: Use the correct grade and amount of oil specified in your vehicle’s owner’s manual. Using the wrong oil can damage your engine.
- Oil Drain Pan: A suitable sized drain pan is needed to collect the old oil. The pan should be large enough to accommodate the expected volume of oil draining from your vehicle.
- Torque Wrench: A torque wrench ensures the oil filter and drain plug are tightened to the manufacturer’s specifications. Improper tightening can lead to leaks or damage.
- Wrench Set: A set of wrenches (including a socket set) for removing the drain plug and oil filter housing. The appropriate sizes will vary depending on the vehicle.
- Gloves and Safety Glasses: Protect yourself from oil spills and debris during the procedure. These safety measures are essential to prevent injuries and maintain hygiene.
- Jack and Jack Stands: Essential for safely lifting the vehicle to access the oil pan. Use jack stands to support the vehicle, ensuring safety during the entire process.
Safety Precautions
Adhering to safety precautions is paramount for a safe and successful oil change.
- Engine Cooling: Allow the engine to cool down before starting the oil change process. Hot oil can cause burns. Wait for the engine to cool sufficiently before proceeding.
- Location: Perform the oil change in a well-ventilated area to avoid inhaling fumes. Ensure the area is clear and level to prevent accidents.
- Proper Lifting: Ensure the vehicle is securely supported on jack stands before working under the car. Incorrect lifting can lead to vehicle collapse.
- Handling Oil: Handle oil with care and avoid contact with skin. If oil gets on your skin, wash it off immediately.
- Dispose of Old Oil Properly: Proper disposal of used oil is crucial to prevent environmental contamination. Check local regulations for proper disposal methods.
2020 Honda Civic Oil Change Procedure
This detailed guide provides a step-by-step process for changing the oil in a 2020 Honda Civic.
- Warm up the engine briefly and allow it to cool slightly. This helps to loosen the oil.
- Position the vehicle on a level surface and place the jack and jack stands to support the vehicle securely.
- Place the drain pan underneath the oil drain plug.
- Loosen the drain plug with the appropriate wrench. Carefully remove the drain plug and allow the oil to drain completely.
- While the oil drains, remove the oil filter. Use the appropriate wrench to loosen the oil filter housing. Discard the old oil filter.
- Install the new oil filter by applying a small amount of new oil to the rubber gasket of the new oil filter. Tighten the filter housing to the specified torque. Ensure the filter is installed correctly to avoid leaks.
- Replace the drain plug and tighten it to the specified torque using a torque wrench.
- Add the correct amount of new oil specified in the owner’s manual. Check the dipstick to ensure the oil level is within the specified range.
- Lower the vehicle and remove the jack stands.
- Start the engine and check for leaks. If there are no leaks, the oil change is complete.
Tools and Materials Needed
This table summarizes the necessary tools and materials for a DIY oil change.
| Item | Description |
|---|---|
| Oil Filter | New oil filter compatible with your vehicle |
| New Oil | Correct grade and quantity specified in your owner’s manual |
| Drain Pan | Large enough to catch the old oil |
| Torque Wrench | To ensure proper tightening of drain plug and filter |
| Wrench Set | Including appropriate sizes for drain plug and oil filter |
| Gloves | Protection from oil and debris |
| Safety Glasses | Protection from flying debris |
| Jack and Jack Stands | For safely lifting the vehicle |
Oil Types and Specifications
Choosing the correct motor oil is crucial for optimal engine performance and longevity. Different types of oil offer varying levels of protection and performance, especially when considering different operating temperatures and driving conditions. Understanding the distinctions between oil types and their viscosity grades is vital for maintaining your vehicle’s health.Understanding the different types of motor oils available, their viscosity ratings, and how these factors impact your vehicle’s performance is key to making informed choices for your oil changes.
This section delves into these crucial aspects.
Motor Oil Types
Various types of motor oil are available, each with unique characteristics. The two primary categories are conventional and synthetic motor oils. Conventional oils are typically derived from crude oil, while synthetic oils are chemically formulated from specific components. Synthetic oils often provide superior protection and performance, especially in extreme temperatures or demanding driving conditions.
Viscosity Grades and Temperature Relationship
Oil viscosity, measured in grades like 5W-30 or 10W-40, indicates how the oil’s thickness changes with temperature. The “W” stands for “winter,” signifying the oil’s cold-weather flow properties. A lower number (like 5W) indicates better cold-weather performance, enabling the oil to flow easily when the engine is cold. The higher number (like 30 or 40) represents the oil’s thickness at higher temperatures.
This is crucial for maintaining proper lubrication in hot conditions. For example, a 5W-30 oil will flow readily at cold temperatures but still provide adequate lubrication at higher temperatures, unlike a heavier 10W-40 oil that might struggle to flow in very cold weather.
Performance Characteristics Comparison
Synthetic oils generally offer better protection against wear and tear, better high-temperature performance, and improved fuel economy compared to conventional oils. They also tend to maintain their viscosity characteristics more consistently across different temperatures. This consistent viscosity translates to better engine protection and lubrication in various conditions. However, synthetic oils typically have a higher cost per quart than conventional oils.
Correct Oil Type for Specific Vehicles
Using the correct oil type is essential for maintaining your vehicle’s warranty and optimal engine performance. Consult your vehicle’s owner’s manual for the specific oil type and viscosity grade recommended by the manufacturer. Deviations from the recommended oil type could lead to potential damage to the engine and void the warranty.
Oil Type Categorization Table
| Oil Type | Viscosity Grade | Suitable Vehicle Types |
|---|---|---|
| Conventional | 5W-30, 10W-30, 10W-40 | Most vehicles, especially those not requiring specific high-performance or extreme temperature protection. |
| Synthetic | 0W-20, 5W-20, 5W-30, 0W-30 | Vehicles requiring higher performance, better protection in extreme conditions, or requiring specific viscosity grades for optimal engine operation. |
| Synthetic Blend | 5W-30, 10W-30 | Vehicles seeking a balance between performance and cost-effectiveness. A good middle ground between conventional and fully synthetic oils. |
Oil Change Cost and Savings
Understanding the cost of an oil change is crucial for making informed decisions about vehicle maintenance. This section details the average costs for professional and DIY oil changes, enabling a comparison and calculation of potential savings.Determining the most economical approach to oil changes depends on several factors, including labor rates, oil and filter prices, and personal time investment. A comprehensive analysis of these elements allows for a clear understanding of the financial implications of each option.
Average Mechanic Shop Oil Change Cost
Mechanic shops typically charge a fee for their labor, along with the cost of oil and filters. This cost varies based on factors like location, shop type (e.g., chain vs. independent), and the specific vehicle model. A reasonable estimate for a standard oil change at a mechanic’s shop ranges from $80 to $150. This encompasses not only the parts but also the labor needed to complete the procedure.
DIY Oil Change Cost Breakdown
Performing an oil change yourself involves purchasing the necessary oil, filter, and any other required parts. The cost of these components is significantly lower than the cost of a professional oil change. The price of oil can vary based on viscosity grade and brand. Filters also differ in price based on quality and brand.
Comparing DIY vs. Professional Oil Change Costs
A comparison of DIY versus professional oil changes demonstrates the potential savings. While the upfront cost of DIY is considerably lower, the time investment required for the process must be considered.
| Category | DIY Oil Change | Professional Oil Change |
|---|---|---|
| Oil (5 quarts) | $20 – $40 | Included in labor cost |
| Filter | $10 – $20 | Included in labor cost |
| Tools (if needed) | $0 – $50 (initial investment) | Included in labor cost |
| Labor | 0 (Time investment) | $50 – $100 |
| Total Estimated Cost | $30 – $60 | $80 – $150 |
Calculating Potential Savings
To calculate potential savings from DIY oil changes, subtract the cost of DIY parts from the estimated cost of a professional oil change. For example, if a professional oil change costs $120 and a DIY oil change costs $40, the potential savings are $80. This calculation highlights the financial benefits of DIY oil changes, especially over time.
Example of Potential Savings
Consider a vehicle that requires an oil change every 3,000 miles. If the professional oil change costs $100 and the DIY oil change costs $30, the savings per oil change are $70. Over the course of a year, with several oil changes, the savings can be substantial. This example underscores the potential financial benefits of DIY maintenance.
Choosing the Right Oil Filter
Selecting the correct oil filter is crucial for optimal engine performance and longevity. A poorly chosen filter can restrict oil flow, leading to premature wear and tear on engine components. This section will detail the key considerations for selecting a compatible oil filter, comparing various brands, and outlining the verification process.
Key Features to Consider, Oil change
Proper oil filtration is essential for maintaining engine health. Factors to consider when choosing an oil filter include the filter’s capacity to effectively trap contaminants, its compatibility with the specific vehicle’s engine design, and its overall build quality. A high-quality filter will efficiently remove dirt, metal particles, and other impurities, ensuring the engine’s moving parts receive clean, lubricated oil.
This helps prevent premature wear and tear, leading to a longer engine lifespan.
Importance of Compatibility
Using a compatible oil filter is paramount for engine performance and safety. An incompatible filter might not properly seal or have the correct flow characteristics for the vehicle’s engine. This can lead to issues such as reduced oil pressure, oil leaks, or premature engine failure. Ensuring compatibility minimizes the risk of these problems and ensures the filter performs its intended function efficiently.
Differences Between Oil Filter Brands and Models
Various brands and models of oil filters exist in the market, each with its own specifications. Differences lie in the filter’s construction, materials, and the capacity to hold filtering media. Different brands may employ varying manufacturing processes, leading to variations in quality, filtration efficiency, and longevity. Some filters may be more robust, suitable for high-performance applications, while others are designed for standard usage.
Checking Filter Compatibility
Verifying compatibility is vital before installing an oil filter. Consult the vehicle’s owner’s manual or a reliable online resource to determine the recommended filter type. The manufacturer’s specifications provide crucial information regarding the correct filter dimensions, flow rates, and pressure ratings. Matching the correct filter model to the vehicle’s engine type guarantees compatibility and avoids potential problems.
Oil Filter Brand Comparison
The following table presents a comparison of common oil filter brands, including their specifications and typical pricing.
| Brand | Filter Model | Filtration Capacity (µm) | Typical Price (USD) | Notes |
|---|---|---|---|---|
| Fram | PH166 | 10 | $8 | Known for reliability and cost-effectiveness |
| WIX | 51026 | 5 | $10 | Offers high filtration efficiency and a broader range of applications |
| Purolator | L10131 | 15 | $7 | Excellent value for everyday vehicle maintenance |
| Bosch | 10025 | 8 | $9 | Often a reliable choice with good filtration performance |
Note: Filtration capacity values are approximate and can vary based on specific filter models. Pricing is approximate and may fluctuate depending on the retailer and location.
Environmental Considerations
Proper oil changes are crucial not only for vehicle performance but also for environmental protection. Improper disposal of used motor oil poses significant risks to ecosystems. Understanding the environmental impact and adopting responsible disposal methods are essential for minimizing harm to the environment.
Impact of Oil Changes on the Environment
The improper disposal of used motor oil and oil filters can lead to severe environmental damage. Spills contaminate water sources, harming aquatic life and potentially entering the human food chain. Oil can also seep into the soil, impacting plant life and the overall ecosystem. Furthermore, improper disposal often involves illegal dumping, exacerbating the problem and causing long-term damage to the environment.
Regular oil changes are crucial for any vehicle’s longevity, and this maintenance is deeply intertwined with the broader automotive industry. The industry relies heavily on consumers like us getting their oil changed to keep their cars running smoothly, which in turn supports the vast network of mechanics and suppliers. Ultimately, proper oil changes contribute significantly to the health and well-being of the entire automotive system.
It is imperative to address this issue through responsible practices.
Proper Oil Disposal Methods
Adopting responsible oil disposal practices is crucial for mitigating environmental harm. The most effective method involves taking used oil to a designated recycling center or an authorized disposal facility. These facilities are equipped to safely handle and recycle used oil, preventing its leakage into the environment. Many local governments have programs to collect used oil, offering convenient drop-off locations.
By utilizing these facilities, individuals and businesses can significantly reduce the environmental impact of oil changes.
Environmental Benefits of DIY Oil Changes
Performing DIY oil changes can offer several environmental advantages. By doing the job themselves, individuals can reduce the reliance on professional services, thus minimizing the transportation emissions associated with oil changes. This reduction in emissions contributes to a lower carbon footprint. Moreover, a DIY approach often leads to greater awareness of the environmental consequences of oil disposal, motivating individuals to adopt responsible practices.
Recycling Oil Filters
Oil filters are another significant component in oil changes. Properly recycling used oil filters is essential to prevent the spread of harmful contaminants. Many recycling centers and auto parts stores accept used oil filters. These filters contain various materials, including metal and plastic, which can be recycled to create new products. This process helps conserve resources and reduce the need for extracting raw materials.
Oil Disposal Options and Environmental Impact
| Disposal Option | Environmental Impact |
|---|---|
| Proper Recycling Center | Minimizes environmental damage. Recycled oil and materials can be reused. |
| Illegal Dumping | High environmental impact. Oil contaminates soil and water sources, harming wildlife and potentially entering the human food chain. |
| Unregulated Landfill | Moderate environmental impact. Oil can leach into groundwater, potentially contaminating water sources. |
| Home Disposal (Incorrectly) | High environmental impact. Oil can be spilled, leading to contamination of soil and water. Improper disposal can lead to illegal dumping. |
Troubleshooting Common Problems
Proper oil change procedures are crucial for engine health, but occasional issues can arise. Understanding potential problems and their solutions empowers you to maintain optimal engine performance and avoid costly repairs. This section details common oil change problems, their causes, and effective troubleshooting steps.
Common Oil Change Problems
Recognizing potential problems during an oil change is essential for preventing further damage. A thorough inspection can identify leaks, low oil pressure, filter issues, and other problems before they escalate. Addressing these problems promptly ensures your vehicle’s longevity and reliability.
- Leaks: Oil leaks are a frequent issue, often stemming from loose or damaged seals, gaskets, or the oil filter housing. Leaks can lead to oil loss, reduced engine lubrication, and potential damage if not promptly addressed.
- Low Oil Pressure: Low oil pressure indicates insufficient lubrication for the engine’s components. This can be caused by low oil levels, worn oil pump, or clogged oil passages. Immediate action is crucial to prevent serious engine damage.
- Oil Filter Issues: Clogged or damaged oil filters impede oil flow, reducing lubrication and potentially causing engine problems. Improper installation or use of a substandard filter can contribute to this issue.
Oil Leaks: Troubleshooting Guide
Addressing oil leaks systematically minimizes the risk of engine damage and costly repairs. A thorough inspection and careful diagnosis are essential.
- Visual Inspection: Carefully examine the engine bay for any visible oil stains, drips, or puddles. Note the location of the leak to pinpoint the source.
- Identify the Source: Trace the oil leak back to its origin. Check the oil filter housing, oil pan, valve cover gaskets, and other potential leak points.
- Tighten Connections: If the leak is from a loose connection, tighten the relevant bolts and fittings using appropriate torque specifications. Ensure that all connections are secure.
- Replace Damaged Parts: If the leak originates from a damaged gasket or seal, replace it with a new, high-quality part. Refer to your vehicle’s repair manual for specific part numbers and installation instructions.
- Re-check for Leaks: After making repairs, re-inspect the engine bay for any lingering leaks. If leaks persist, repeat the troubleshooting steps to identify the root cause.
Oil Filter Issues: Diagnosis and Resolution
Oil filter problems often stem from improper installation or the use of a substandard filter.
- Examine the Filter: Inspect the oil filter for any signs of damage, such as cracks or leaks. Look for obstructions or blockages that might impede oil flow.
- Verify Proper Installation: Ensure the oil filter is correctly installed with the correct orientation. Refer to your vehicle’s repair manual for specific installation instructions. A misaligned filter can lead to poor sealing and leaks.
- Filter Selection: Use a high-quality oil filter recommended by your vehicle manufacturer. Using a substandard filter can lead to performance issues and reduced engine life.
“Always select the correct oil filter type for your vehicle.”
- Replace the Filter: If the filter is damaged or malfunctioning, replace it with a new one. Ensure the filter is properly tightened to prevent leaks.
Summary Table
| Problem | Possible Causes | Solutions |
|---|---|---|
| Oil Leaks | Loose connections, damaged seals/gaskets, worn components | Tighten connections, replace damaged parts, inspect for wear |
| Low Oil Pressure | Low oil levels, worn oil pump, clogged oil passages | Check oil level, replace oil pump, clean oil passages |
| Oil Filter Issues | Clogged filter, damaged filter, improper installation | Inspect filter, replace filter, ensure correct installation |
Maintenance and Inspection
Regular vehicle maintenance, including oil changes, is crucial for optimal engine performance and longevity. Proper maintenance not only extends the life of your vehicle but also ensures its safe and reliable operation. Neglecting these procedures can lead to costly repairs down the line.A proactive approach to maintenance involves more than just the oil change itself. Critical components, like the oil filter and oil level, require consistent monitoring and inspection.
These procedures, combined with a pre-oil change vehicle inspection, provide a comprehensive strategy to maintain your vehicle’s health and prevent potential problems.
Importance of Regular Oil Change Maintenance
Regular oil changes are vital for maintaining engine health. Fresh oil lubricates moving parts, preventing friction and wear. This lubrication minimizes engine component damage, thus increasing engine life. Accumulated contaminants and debris in the oil, from combustion or wear, can reduce lubrication and cause premature engine failure. Regular oil changes remove these contaminants, restoring optimal lubrication.
Checking Oil Level and Condition
The oil level and condition provide critical insights into the engine’s health. A low oil level can lead to engine damage from lack of lubrication. Checking the oil level is a simple procedure and a vital part of preventive maintenance. The oil’s appearance and viscosity also provide valuable information. Dark, thick oil suggests the need for a change, as it has accumulated contaminants and lost its lubricating properties.
A clear, light-colored oil indicates that the oil is functioning correctly.
Inspecting the Oil Filter for Damage or Wear
The oil filter plays a critical role in removing contaminants from the oil. Inspecting the oil filter for damage or wear is essential. A damaged or clogged filter cannot effectively remove contaminants, resulting in a compromised lubrication system. Look for signs of physical damage, such as leaks or tears. If the filter is visibly dirty or clogged, it needs replacement.
A clean, undamaged oil filter ensures that the oil is adequately filtered.
Additional Maintenance Procedures After an Oil Change
After an oil change, it’s crucial to ensure the oil level is correct and the oil filter is properly installed. Confirming the oil level and checking the filter’s proper installation are essential. A low oil level can lead to severe engine damage, while a poorly installed filter can compromise the engine’s lubrication.
Regular oil changes are crucial for vehicle maintenance, ensuring optimal engine performance. Properly maintaining your car involves a whole host of tasks, like oil changes, tire rotations, and more, all part of the broader field of auto repair. Ultimately, consistent oil changes contribute significantly to the longevity and reliability of your vehicle.
Pre-Oil Change Vehicle Inspection Checklist
This checklist assists in a thorough pre-oil change inspection. A well-prepared inspection prevents unforeseen issues during the oil change process.
| Item | Action |
|---|---|
| Engine Oil Level | Check the oil level using the dipstick. |
| Oil Filter Condition | Visually inspect the oil filter for damage or leaks. |
| Coolant Level | Check the coolant level in the reservoir. |
| Fluid Levels (Power Steering, Brake, etc.) | Inspect all fluid levels for proper condition and sufficient levels. |
| Hoses and Belts | Inspect hoses and belts for damage, cracks, or wear. |
| Lights and Signals | Check all lights, signals, and wipers. |
| Tires | Inspect tire pressure, tread depth, and condition. |
| Other Components | Check for loose parts, leaks, or unusual noises. |
Safety During Oil Change
Performing an oil change safely is crucial for preventing accidents and ensuring your well-being. Following proper safety precautions minimizes risks associated with potential hazards like spills, burns, and equipment malfunction. This section details essential safety measures for a secure and efficient oil change process.
Importance of Safety Gear
Appropriate safety gear is paramount during any automotive maintenance task, including oil changes. Protecting yourself from potential hazards is essential. This includes wearing protective clothing to safeguard against spills, cuts, and other risks.
- Eye Protection: Safety glasses or goggles are vital to shield your eyes from flying debris, splashes, or chemical exposure. Always wear them, even if the task seems minor.
- Gloves: Using disposable nitrile or latex gloves prevents skin contact with oil, reducing the risk of irritation or long-term health issues. Oil can penetrate skin and cause various problems.
- Long Sleeves and Pants: Cover exposed skin to prevent oil from coming into contact with your body. This minimizes the potential for irritation and the absorption of harmful substances through the skin.
Preventing Accidents
Avoiding accidents during oil changes requires careful planning and execution. Proper preparation and adherence to safe procedures greatly reduce the risk of injury or damage.
- Secure the Vehicle: Park the vehicle on a level surface and engage the parking brake. This prevents unexpected movement during the oil change.
- Gather Necessary Tools: Ensure you have all the required tools before starting the process. A disorganized workspace can lead to errors and accidents.
- Use Proper Lifting Techniques: If lifting the vehicle, use the appropriate jack stands and follow the manufacturer’s instructions. Improper lifting can lead to serious injury or vehicle damage.
- Avoid Overexertion: Take breaks if needed, especially if the job is physically demanding. Fatigue can lead to mistakes and accidents.
Proper Ventilation and Oil Handling
Maintaining proper ventilation and handling oil safely are critical for preventing health issues and environmental contamination.
- Ventilation: Work in a well-ventilated area. Open windows or use a fan to circulate air and disperse any fumes released during the process. Avoid working in a closed garage without proper ventilation.
- Oil Disposal: Dispose of used oil properly. Never pour used oil down the drain. Contact your local authorities for guidelines on proper oil disposal. Improper disposal can pollute the environment.
- Oil Spill Prevention: Use containers with secure lids to collect used oil. Place absorbent materials (e.g., shop towels) around the work area to contain any spills. Clean up any spills promptly to prevent environmental contamination.
Safety Tips
Following these safety tips can significantly minimize risks associated with oil changes.
- Check the Oil Level Before Starting: Ensure the oil level is appropriate to avoid potential complications and unnecessary risks during the change process.
- Always Follow Manufacturer’s Instructions: Adhering to the manufacturer’s guidelines ensures proper procedures and minimizes risks.
- Work in a Clean Environment: A clean workspace helps prevent accidents and ensures efficient work. Clutter can lead to falls or injuries.
- Inspect Tools Before Use: Verify that tools are in good working order to avoid malfunctions during the process.
- Keep Children and Pets Away: Ensure that children and pets are not present in the work area to prevent accidental injuries or exposure to harmful substances.
DIY Oil Change Resources
Taking on an oil change yourself can save you money and provide a satisfying hands-on experience. However, it’s crucial to approach this task with the right knowledge and resources. Proper procedures are vital to ensure engine health and longevity.
Online Resources for DIY Oil Change Guides
Numerous websites offer detailed DIY oil change guides. These resources provide step-by-step instructions, helpful visuals, and often address specific vehicle models. Consulting these guides can be a valuable learning experience.
- Auto repair websites often feature comprehensive tutorials. These tutorials typically offer clear, step-by-step instructions, diagrams, and videos, making the process easier to understand. Some popular websites include resources specifically for DIY oil changes, while others include this as part of their broader auto repair content.
- Manufacturer websites frequently have maintenance guides. These are typically comprehensive and often provide specific instructions for particular vehicle models, enhancing the accuracy of the procedure. Referencing these guides can significantly improve the chances of a successful and safe DIY oil change.
- YouTube channels dedicated to automotive repair provide valuable visual aids. These channels often offer video tutorials demonstrating the process, including common mistakes and solutions. The visual aspect can greatly assist in understanding the practical steps of the procedure.
Reputable Websites with DIY Oil Change Tutorials
Finding reliable websites is essential to avoid potential errors in the oil change process. A trustworthy website will offer accurate information, comprehensive instructions, and safety precautions.
- Websites specializing in automotive repair, like [example website 1], provide detailed guides, diagrams, and videos for various car models. These sites are often updated regularly and focus on accuracy.
- Manufacturer websites often provide comprehensive service manuals that can include DIY oil change procedures. These are typically well-researched and detailed, ensuring accuracy and safety.
Reliable Sources for Information on Oil Change Procedures
Verifying the accuracy of information is critical to ensuring the success and safety of the oil change process. Reliable sources will use credible data and follow established industry standards.
- Automotive repair manuals are a primary source of information. They provide precise instructions tailored to specific vehicle models. Referencing these manuals can minimize the chances of errors.
- Professional mechanics are knowledgeable sources. While not directly providing DIY instructions, their expertise can help identify and correct any potential issues during the process.
Importance of Seeking Professional Help If Needed
Understanding when to seek professional help is vital. Some vehicles or situations may require specialized tools or expertise. Avoid potential problems by seeking professional assistance if needed.
- If you’re uncertain about any aspect of the oil change process, seeking professional help is always recommended. A mechanic can identify any issues that might be present.
- Certain vehicles may have intricate systems or require specific tools that a DIY enthusiast might not possess. In such cases, it’s wise to rely on the expertise of a professional.
Summary of a Helpful DIY Oil Change Guide
A reliable DIY oil change guide should include clear step-by-step instructions, safety precautions, specific tools needed, and troubleshooting advice. Visual aids, like diagrams or videos, can further enhance understanding. The guide should also clearly state the type of oil and filter recommended for the specific vehicle. Furthermore, the guide should emphasize the importance of proper disposal of used oil and filter.
Wrap-Up
In conclusion, performing regular oil changes is paramount to maintaining a healthy and efficient vehicle. Whether you choose to tackle the task yourself or entrust it to a professional, understanding the factors affecting oil change frequency, the proper procedure, and the importance of using the right oil and filter is key. By following the guidelines in this comprehensive guide, you’ll be well-prepared to keep your vehicle running smoothly and efficiently for years to come.
FAQ Section
How often should I change my oil?
Oil change frequency depends on several factors, including your vehicle type, driving conditions, and manufacturer recommendations. Consult your owner’s manual for specific recommendations.
What are the safety precautions for a DIY oil change?
Always wear appropriate safety gear, ensure proper ventilation, and handle oil with care. Dispose of used oil and filters responsibly.
What are the different types of motor oil?
Motor oil types include conventional, synthetic, and synthetic blend. Synthetic oils typically offer better performance in various temperatures, while conventional oils are often more affordable.
What tools are needed for a DIY oil change?
Tools required for a DIY oil change typically include a wrench, oil pan, funnel, rags, and safety glasses. Refer to your vehicle’s manual for specific tools.


